This topic explains the fundamentals of gasoline fuel delivery and evaporative emissions (EVAP) systems, and gives practical, low-cost methods for inspection, testing and repair that are appropriate for resource‑constrained African contexts. Emphasis is on safe, robust techniques that use commonly available tools and materials while maintaining acceptable professional standards and legal compliance.
Contents
- Overview and learning outcomes
- Key components and basic theory
- Common faults and symptoms
- Preventive maintenance: fuel pump, filter and lines
- Evaporative emissions (EVAP) concepts and common failures
- Low‑tech diagnostic and test procedures
- Pragmatic repair approaches compatible with low‑resource environments
- Safety, disposal and environmental considerations
- Tools, materials and competency checklist
Overview and learning outcomes
- Understand the purpose and operation of the fuel delivery system and the EVAP system on gasoline engines.
- Be able to identify common symptoms of fuel delivery and EVAP faults.
- Perform basic inspections, low‑cost tests and simple repairs using locally available materials and tools.
- Know safety procedures for handling fuel and fuel‑soaked materials and for working on pressurised components.
Key components and basic theory
- Fuel tank: stores fuel; may include internal baffles and a pickup tube; has a filler cap and venting system.
- Fuel pump:
- In‑tank electric pump (most modern vehicles) — electric motor, internal strainer/sock, usually submerged.
- Mechanical pump (older vehicles) — diaphragm type driven by engine cam.
- Fuel filter / sediment bowl: removes particulates and water (where present). Inline filter may be upstream of injectors.
- Fuel lines: metal (steel, aluminium) or rubber/plastic hoses that carry fuel from tank to engine and return unused fuel if a return system is used.
- Fuel pressure regulator: maintains required rail pressure; on some systems integrated into fuel rail or within the pump assembly (returnless systems do not have a separate return line).
- Fuel injectors and rail: deliver metered fuel to intake ports; rail stores pressurized fuel.
- EVAP system: charcoal canister (vapor capture), purge valve/solenoid, vent valve, fuel tank pressure sensor, hoses and charcoal canister vent/mounts.
Basic operating pressures (typical ranges; confirm with manufacturer data):
- Multi‑point fuel injection (MPFI) rails: approx. 30–60 psi (200–420 kPa); many modern systems ~40–55 psi (275–380 kPa).
- Low pressure fuel lines (supply) and return lines are generally below these values; evaporative system operates at near‑atmospheric to small vacuum/pressure excursions only.
Note: Always consult the vehicle service data for exact values before performing pressure tests.
Common faults and symptoms
- Fuel pump failure: engine cranks but does not start, long crank time, intermittent stalling, poor acceleration, sudden loss of power.
- Clogged fuel filter: reduced engine power under load, hesitation, misfires at high throttle.
- Fuel line leakage/deterioration: fuel odor, visible wetness, staining, low fuel pressure, risk of fire.
- Fuel contamination (water, sediment): hard starting, misfire, corrosion of components.
- EVAP faults: strong fuel odor near vehicle, fuel smell in cabin, Check Engine Light (MIL) on (EVAP codes), fuel tank venting problems, fuel soak in charcoal canister (saturated canister).
- Loose or missing filler cap: EVAP code, fuel odor, slight driveability concerns.
Preventive maintenance — fuel pump, filter and lines
General principles:
- Maintain cleanliness and filtration tolerance; prevent water ingress; keep venting paths clear.
- Use fuel‑rated hoses and suitable clamps; avoid unsuitable garden or domestic hoses.
- Replace consumables on a regular schedule and after suspected contamination events.
Suggested preventive schedule (adapt to local conditions and manufacturer guidance):
- Fuel filter: inspect every 5,000–10,000 km; replace every 10,000–20,000 km in poor fuel quality areas.
- Fuel pump strainer (sock): inspect on pump removal or if symptoms appear; replace if clogged.
- Visual inspection of fuel lines and connectors: at every service interval (e.g., oil change).
- Filler cap: inspect seal for cracks and proper seating at every fuel stop routine check.
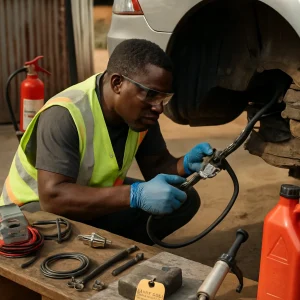
Inspection procedure for lines and connections (simple, low‑tech)
- Park on level ground, engine off, keys removed. Work in a well‑ventilated area, away from open flames.
- Visually inspect rubber hoses for cracks, hardening, swelling, soft spots, blisters or oil saturation. Inspect metal lines for corrosion, denting or perforation.
- Inspect clamps: wormdrive clamps, ear clamps, or crimp fittings should be tight and not cutting into hoses. Replace rusty or loose clamps.
- Smell check: fuel odor often indicates leak; locate wet spots and track to source.
- Use soapy water solution (water + small amount of soap) on connections (only for low‑pressure or EVAP hoses). Bubbles indicate a leak. Do not use on high‑pressure fuel rail while engine is running.
- If fuel is suspected in the charcoal canister or venting lines, inspect with caution and smell for fuel saturation.
Low‑tech fuel pump testing
Tools required: basic multimeter, 12 V test leads or jumper, spare clean container for sample, simple fuel pressure gauge if available.
Electrical supply check:
- Locate pump connector at tank or inline fuse/relay. With ignition ON (not cranking) measure voltage at pump connector; expect battery voltage (~12 V) at feed terminal.
- Crank engine and verify a continuous voltage supply; intermittent voltage indicates wiring or relay fault.
- Check fuse and relay for the fuel pump circuit; swap with identical relay to test.
Mechanical/effective delivery checks:
- If you have a fuel pressure gauge, connect it to the fuel rail test port and compare to specification.
- If no gauge is available, observe symptoms: if pump receives voltage but engine will not start, or cranks slowly, consider pump internals or blocked filter.
- For in‑tank pumps, removal and inspection of the pump sock/strainer for contamination gives a good indication of pump condition.
Evaporative emission (EVAP) concepts — practical summary
- Objective: prevent gasoline vapours from escaping to atmosphere by capturing them in a charcoal canister and routing them to the intake manifold for combustion when conditions permit.
- Components of concern in low‑resource contexts:
- Charcoal canister: can become saturated with liquid fuel if the tank is overfilled or if a leak or faulty venting is present.
- Purge valve/solenoid: opens to allow stored vapours into intake; electrical device that can fail stuck open/closed.
- Vent valve or vent solenoid: allows canister to breathe to atmosphere when required; if stuck closed can cause pressure build‑up.
- Hoses and fittings: small vacuum hoses often brittle — common source of leaks.
- Symptoms specific to EVAP issues: persistent fuel smell, fuel in canister, difficulty refuelling (tanker nozzle shutting off quickly), MIL illuminated with EVAP fault codes.
Low‑tech EVAP diagnostic methods
- Visual and smell inspection:
- Inspect hoses for deterioration and loose fittings.
- Smell around the canister; wet or strong fuel smell indicates saturation.
- Cap test:
- Remove fuel filler cap and inspect seal. A damaged cap often causes EVAP codes. Replace inexpensive caps before performing advanced diagnostics.
- Purge valve basic test:
- With engine off, apply a small vacuum by mouth to the purge valve hose (if safe and accessible) and listen for click when applying battery voltage to valve — it should open and close. Safer: use a handheld vacuum pump to check operation.
- Electrical check: measure coil resistance with a multimeter (compare to manufacturer spec) and apply 12 V briefly to confirm it clicks.
- Simple pressure/decay test for EVAP integrity:
- Create a slight vacuum or low positive pressure in the sealed EVAP line using a hand pump and observe if pressure holds. Because EVAP systems operate close to atmospheric, only small excursions are used; watch for any pressure change over a few minutes.
- A professional smoke machine is best for locating small leaks. Where unavailable, a basic smoke test can sometimes be improvised using a small, controlled smoke source and a closed system — but this carries fire/safety risk and should be avoided unless trained and safe equipment is used.
- Charcoal canister inspection:
- Remove and shake (outdoors) — liquid sloshing or heavy mass suggests saturation. If saturated, canister must be replaced or dried and reused only cautiously; replacement is preferred.
Pragmatic repair approaches compatible with low‑resource environments
General guidance
- Use correct replacement parts when possible. For temporary repairs, ensure the method is safe and clearly labelled for replacement at the next appropriate opportunity.
- Avoid makeshift fuel lines using non‑fuel rated hose or household materials as these can swell, fail and cause fire.
Low‑cost replacement options
- Fuel hose: Obtain automotive fuel‑rated rubber hose from local parts shops; where not available, source hoses known to be fuel resistant (NBR/Nitrile or specified automotive materials) — verify by asking suppliers. Do not use ordinary garden hose or PVC.
- Clamps: use worm gear clamps or ear/crimp clamps sized correctly. Avoid wire twisting or inadequate ties.
- Inline filters: replace or add a simple paper inline fuel filter between tank and pump or between pump and engine per system design. In areas with very poor fuel quality consider a fuel/water separator or sediment bowl for diesel and petrol where compatible.
- Charcoal canister: if saturated and no replacement is available immediately, remove canister and store upright to allow drainage, but be aware this is only a temporary measure. Strongly recommend replacement when possible.
- Purge valve: inexpensive to replace; remove and bench test before substitution. Many purge valves are common across models — local salvage yards often have functional parts.
Field repair examples
- Leaking rubber hose at joint:
- Cut back to sound material.
- Fit an approved fuel hose splice (brass barbed joiner) if available and secure with correct clamps; alternatively replace entire section with new fuel‑rated hose.
- Do not use adhesives or tape as primary sealing method; if used as temporary measure, tape must be replaced promptly.
- Small hard‑to‑reach line crack:
- Temporarily use a short length of fuel hose over the damaged area with two properly sized clamps; label as temporary and replace permanently as soon as possible.
- Clogged filter suspected:
- Replace inline filter. If unavailable, remove filter and briefly run fuel (carefully collect in approved container) to check for flow — this is only for diagnostic purposes and not for prolonged operation without a filter.
Low‑cost leak detection (EVAP and fuel lines)
- Soapy water: safe for low‑pressure hoses and connector testing; watch for foam forming at leak points.
- Visual trail and smell: follow fuel dripping or staining back to source.
- Dye method (caution): small amounts of fuel dye added to tank can make leaks easier to locate, but dyes can complicate disposal and may not be legal in all jurisdictions; use only if legally permitted and safe procedures are in place.
Safety, disposal and environment
- Work in a well‑ventilated open area; keep ignition sources, welding and naked flames away.
- Use personal protective equipment: solvent‑resistant gloves, eye protection, long sleeves, and fire extinguisher nearby (dry chemical or foam rated for hydrocarbon fires).
- Never smoke while working with fuel.
- Fuel‑soaked rags and materials: allow to dry in open, ventilated area away from ignition sources and dispose of in accordance with local regulation. If incineration is used, do so safely with permission.
- Battery connections and live electrical tests: ensure no fuel vapour concentration is present when making electrical connections or using power.
Tools and materials list (basic, locally obtainable)
- Multimeter (basic voltage and resistance)
- Basic hand tools (screwdrivers, pliers, ring/open wrenches)
- Fuel‑rated rubber hose and appropriate clamps (worm drive or ear clamps)
- Inline fuel filter(s) and/or replacement pump strainer/sock
- Hand vacuum pump (for checking purge valves and small vacuum lines) — inexpensive and versatile
- Fuel pressure gauge (if available) or access to one through local shop
- Approved fuel containers and funnels for safe fuel transfer
- Absorbent pads or approved spill kit materials
- Flashlight and mirror for inspection under vehicle or tight spaces
Competency checklist (for learners)
- Identify and describe the purpose of fuel system and EVAP components.
- Perform a visual inspection of fuel lines, hoses and clamps and identify at least three types of defects (e.g., hardening, cracking, leak).
- Test basic electrical supply to an in‑tank electric pump and interpret the result.
- Replace an inline fuel filter and prime system safely.
- Perform a simple purge valve operation check using a hand vacuum pump and a 12 V activation test.
- Conduct a simple EVAP pressure/decay test and document findings.
- Propose a safe, temporary repair for a small fuel hose leak and explain why it is temporary and what permanent action is required.
Notes and limitations
- This topic provides practical, low‑cost techniques for inspection, diagnosis and repair. It does not replace vehicle manufacturer service data or specialised diagnostic equipment for complex faults.
- Always prioritise safe permanent repairs over long‑term improvised solutions. Improvised repairs are acceptable only as temporary measures to move a vehicle safely to a repair facility.
- Some EVAP faults (small leaks, internal canister damage, or sensor/electronic faults) may require specialised equipment (smoke machine, calibrated pressure pump, OBD‑II scanner with EVAP tests) or replacement parts that are best handled by a trained technician or accessible workshop.
References and further reading (recommended)
- Manufacturer service manual for the specific vehicle (pressures, connector locations, replacement procedures).
- Local regulations concerning fuel handling and disposal.
- Training on hazardous material handling and fire safety for mechanics.
End of topic.