(Level: Beginner — Resource-Constrained Contexts)
This topic covers the functional behavior, common failure modes, and hands‑on maintenance procedures for:
- engine oil systems (lubrication),
- cooling systems (radiator, water pump, thermostat),
- hydraulic braking systems (master cylinder, lines, calipers/drums).
Content emphasizes safe, low‑cost methods and use of locally available tools and materials. Where a temporary or improvised repair is proposed, the limitations and recommended follow‑up actions are indicated.
Learning objectives
After completing this topic the learner will be able to:
- Explain the basic operating principles of engine lubrication, engine cooling, and hydraulic braking systems (simple fluid mechanics concepts).
- Identify common failure modes and symptoms for oil systems, radiators, water pumps and hydraulic brakes.
- Perform routine inspections and low‑cost maintenance tasks: oil and filter change, radiator flush, radiator cap check, simple water pump inspection, brake pad/shoe checks, brake bleeding and fluid replacement using improvised kits.
- Use safe work practices, basic diagnostic checks and recordkeeping appropriate for constrained environments.
- Propose appropriate temporary repairs and evaluate when replacement or professional repair is required.
Required safety precautions and preparatory checklist
- Work area: level, well‑ventilated, well‑lit. No open flames when working with fuels/oil.
- Personal protective equipment (PPE): gloves, eye protection, closed‑toe shoes, apron.
- Vehicle securement: parking brake on, wheels chocked, use jack stands for lifted vehicles (do not rely on the jack alone).
- Tools (minimum, low‑cost option): basic spanners and sockets, screwdrivers, pliers, oil filter wrench (or strap/cloth), drain pan, clear plastic tubing (6–8 mm inner diameter) for bleeding, transparent container for brake fluid, funnel, rags, wire brush, small hand pump or syringe (optional), simple dipstick or ruler, adjustable spanner, calipers or ruler for pad thickness, plunger for pressure check (for radiator cap test).
- Consumables: engine oil of correct grade (local equivalent), replacement oil filter, clean water, basic coolant or antifreeze if available, spare rags, inexpensive sealant only as temporary measure (not a permanent fix), replacement brake fluid (correct DOT type), washing soap or mild degreaser.
Basic functional behavior (concise fluid mechanics principles)
- Lubrication: The oil pump (typically gear, rotor or trochoid in small engines) is a positive‑displacement pump that pressurizes oil and delivers it through galleries to bearings, camshaft and other components. Oil reduces friction by maintaining a hydrodynamic film between moving parts; viscosity is the key fluid property that maintains film thickness. Oil also carries heat and contaminants (so filtration and circulation are necessary).
- Cooling: Most engines use a liquid cooling loop with a centrifugal water pump that circulates coolant through the engine block and head, radiator (heat exchanger) and thermostat. Heat transfer includes convection (liquid through passages) and forced convection in the radiator with airflow. The radiator cap provides pressure control; raising boiling point and controlling overflow.
- Braking (hydraulic): Pascal’s law — force applied to the brake pedal moves the master cylinder piston, creating hydraulic pressure that is transmitted equally through incompressible brake fluid to wheel cylinders or caliper pistons. Mechanical advantage is determined by piston areas and lever ratios. Brake fluid is hygroscopic (except DOT 5 silicone), and the presence of air compresses the system causing spongy pedal feel.
Common failure modes and symptoms
Oil system
- Low oil level → engine noise, increased wear, overheating.
- Contamination (fuel dilution, soot, water) → reduced lubrication, increased wear; oil appears thin, smells of fuel, or milky (water/coolant).
- Clogged oil filter/strainer → oil starvation, pressure drop, knocking.
- Oil leaks (gaskets, seals) → visible puddles, low level.
- Worn bearings or oil pump failure → low oil pressure, knocking noises, metallic debris in oil.
Cooling system
- Overheating → temperature gauge high, steam, coolant loss.
- Radiator blockages (sediment, scale) → reduced flow, local overheating.
- Radiator leaks (tubes, core) → external coolant loss, reduced effectiveness.
- Faulty radiator cap → loss of system pressure, early boiling, coolant overflow.
- Water pump failure → leakage at weep hole, bearing noise, shaft play, inadequate circulation.
- Thermostat stuck closed → rapid overheating; stuck open → slow warm‑up, poor heater performance.
- Airlocks → hot spots, intermittent overheating.
Braking system
- Spongy/soft pedal → air in lines, contaminated fluid.
- Hard pedal or poor return → seized caliper/piston or master cylinder internal issues.
- Fluid leak (lines, hoses, wheel cylinder, caliper) → reduced braking, puddles at wheels.
- Excessive pad or shoe wear → reduced braking efficiency, metal‑on‑metal noise.
- Brake fade → overheating, contaminated pads, fluid boiling.
- Uneven braking → caliper seize, stuck slider pins, collapsed brake hose.
Practical inspections (simple checks)
- Oil level and condition
- Warm engine to normal operating temperature, switch off, wait 2–3 min, then check dipstick. Note level and colour/odour (burnt smell, fuel smell, milky).
- Cooling system
- Check coolant reservoir level (engine cold). Inspect radiator for external damage, fins blockage, leaks. Carefully (engine cold) remove radiator cap and inspect coolant colour and presence of oil (milky emulsion indicates head gasket failure).
- Water pump
- Inspect for coolant leak at weep hole, check shaft for play by attempting to wobble pulley.
- Radiator cap
- Inspect rubber seal for brittle/cracked condition.
- Brakes
- Measure pad thickness (if no caliper: inspect through wheel openings) – typical minimum pad thickness ~1–3 mm depending on design. Check brake fluid level in master cylinder; note colour (dark indicates old fluid).
- Lines & hoses
- Inspect for cracks, bulges, oil/wetness along lines. Squeeze soft hoses to check collapse or swelling.
Hands‑on maintenance procedures (step‑by‑step)
Note: Estimated time and difficulty given (Easy/Moderate/Advanced). Always record performed work and measurements.
-
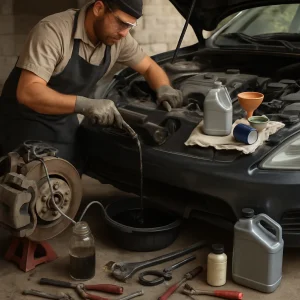
Engine oil and filter change
- Time: 30–60 min. Difficulty: Easy.
- Tools: drain pan, spanners, funnel, oil filter wrench or strap/cloth.
- Procedure:
- Warm engine slightly to loosen contaminants (do not scald).
- Park on level surface, chock wheels.
- Place drain pan under oil sump, remove drain plug, allow oil to drain fully.
- Remove oil filter (catch oil), clean mounting face, apply a light film of new oil to new filter gasket, fit new filter hand‑tight (plus 3/4 turn).
- Refit drain plug with correct torque (or secure with practicable tightness if torque wrench unavailable).
- Refill with correct grade and approximate quantity using funnel. Start engine for 30–60 seconds, check for leaks, switch off, wait 2–3 minutes and re‑check level and top up to dipstick “full”.
- Dispose of used oil responsibly (local collection points or sealed containers for recycling).
- Notes: If filter not available, clean old filter only as emergency measure and replace as soon as possible.
-
Simple radiator flush and refill (low‑cost)
- Time: 45–90 min. Difficulty: Moderate.
- Tools: drain pan, funnel, hose, simple brush for fins, bucket.
- Procedure:
- With engine cold, open radiator drain petcock or remove lower hose to drain coolant into container.
- Remove thermostat (if easily accessible) or keep it in—if in, be aware some coolant remains.
- Close drain, refill with clean water, run engine until thermostat opens, run briefly then drain again. Repeat until drained water is comparatively clear.
- If available, use a mild commercial radiator flush; otherwise repeat water flush to reduce deposits. Avoid strong acids or improvised caustics that will damage metals/seals.
- Refill with recommended coolant mixture or clean water with corrosion inhibitor if no antifreeze is available. Leave small air bleed screws open (if fitted) while filling.
- Start engine, open heater to max, run until thermostat opens, top up, watch for air bubbles; after warm‑up, stop and check level again when cold.
- Notes: Water alone is acceptable short‑term but risks corrosion and reduces boiling point; use antifreeze/corrosion inhibitor when possible. Avoid mixing different coolant chemistries without checking compatibility.
-
Radiator cap test and temporary repair
- Time: 15–30 min. Difficulty: Easy.
- Cap test:
- Visual: check rubber seal for cracks/flattening.
- Simple pressure check: submerge cap in water and depress valve while pressurizing radiator neck with an improvised hand pump (if available). If not available, cap with deteriorated seal should be replaced.
- Temporary patch for small leaks (temporary only):
- Clean area, apply epoxy/patch rated for cooling systems; note this is short‑term and may clog small passages—arrange professional repair.
- Recommended: source replacement cap locally; inexpensive and effective.
-
Water pump inspection and belt tension
- Time: 15–45 min. Difficulty: Easy/Moderate.
- Procedure:
- Inspect pump pulley for wobble/shaft play by gripping pulley and attempting lateral movement. Spin pulley—listen for rough bearings.
- Check weep hole for coolant drips (evidence of seal failure).
- Check drive belt condition (cracks, glazing) and tension. Use straightedge equilibrium or 10 mm deflection rule at midpoint under finger pressure (vehicle‑specific—consult manual). Adjust tensioner if available.
- If bearing play or leaks present, plan replacement. On some vehicles water pumps are inexpensive and locally available.
-
Thermostat check and replacement (simple test)
- Time: 30–60 min. Difficulty: Moderate.
- Test: remove thermostat and place in a pot of water; heat gently and observe opening at specified temperature (if numbers unknown, it should open gradually at typical engine temp ~80–95°C). Replace if stuck closed or open.
- Replace gasket and reassemble, use new gasket or sealant rated for coolant systems.
-
Brake pad/shoe inspection and replacement
- Time: 45–120 min per axle. Difficulty: Moderate.
- Procedure (disc pads):
- Lift vehicle, remove wheel, inspect pad thickness and rotor condition.
- If pad thickness below minimum, remove caliper bolts, slide caliper off. Compress caliper piston using a C‑clamp or equivalent (watch for fluid overflow in master cylinder; cap open to monitor fluid level).
- Replace pads, clean sliding pins, apply high‑temperature grease to pins (avoid getting grease on pad friction surfaces).
- Refit caliper and wheel, lower vehicle, pump pedal gently before driving.
- Procedure (drum shoes):
- Remove drum, inspect shoes, springs and wheel cylinder.
- Replace worn shoes, clean drum, lubricate contact points lightly.
- Adjust shoe clearance per vehicle spec (or adjust until slight drag on drum).
- Notes: Use local replacement parts where possible and check compatibility.
-
Brake fluid replacement and bleeding (manual gravity or improvised vacuum)
- Time: 30–90 min. Difficulty: Moderate.
- Safety: use correct DOT fluid; brake fluid damages paint—protect surfaces.
- Procedure (gravity bleeding, single‑person):
- Top up master cylinder with clean fluid and keep capped except when bleeding.
- Attach clear tubing to bleed nipple, other end to a transparent container with fresh fluid to avoid drawing in air.
- Open wheel bleed nipple 1/4 turn. Open cap on master cylinder. Allow fluid to flow slowly (gravity will draw old fluid out).
- Close nipple when flow stops, move to next wheel. Refill master cylinder frequently to prevent air entry.
- Procedure (two‑person pump and hold):
- Person A presses brake pedal slowly and holds.
- Person B opens bleed nipple briefly to release fluid and air, then closes nipple while pedal held.
- Person A releases pedal only after nipple is closed.
- Repeat until clear, air‑free fluid appears.
- Vacuum bleeding (using improvised hand pump or brake bleeding kit) is faster where available.
- Final checks: ensure pedal firmness, check for leaks, test on low‑speed run.
-
Detecting and dealing with leaks in lines and hoses
- Time: 15–60 min. Difficulty: Easy/Moderate.
- Procedure:
- Pressure wash and dry suspected areas to locate wet spots.
- For small pinhole leaks on metal lines, temporary repair with muffler tape or hose clamp + rubber sleeve can be used to get the vehicle to a workshop. This is temporary—replace the line when possible.
- Replace flexible hoses that are cracked, bulged, or soft. Use locally sourced brake hoses matched to threads and length.
Troubleshooting quick reference (symptom → likely cause → immediate action)
-
Overheating after short drive
- Causes: low coolant level, blocked radiator fins, faulty radiator cap, thermostat stuck closed, airlock.
- Immediate actions: stop engine, allow to cool, check coolant level, visually inspect radiator and hoses, loosen bleed screw(s) and refill slowly, replace cap if obviously faulty.
-
Engine oil level dropping rapidly
- Causes: leak (gasket, seal), burning oil (piston rings), failing turbo (if fitted).
- Immediate actions: find leak visually, top up oil, avoid long high‑RPM runs, plan compression/leakdown check.
-
Spongy brake pedal
- Causes: air in system, contaminated fluid, leak in hydraulic system.
- Immediate actions: check fluid level, inspect for leaks, bleed brakes.
-
Brake fluid dark and dirty
- Causes: moisture, breakdown of fluid, contamination.
- Immediate actions: flush/replace fluid, avoid simple topping up without flush.
-
Radiator leaking small spots at seams
- Causes: corroded core, joint failure.
- Immediate actions: temporary sealant or patch for short journeys; plan for professional repair or replacement.
Low‑cost improvisation and sourcing tips (suitable for constrained contexts)
- Filters and fluids: use manufacturer specifications but source equivalent brands available locally. Prioritize appropriate viscosity and DOT classification.
- Oil filters: if unavailable, clean existing filter and install new gasket or consider temporary use of a spin‑on filter adapter with a locally made gasket—record and replace later.
- Brake bleeding kit alternative: clear tubing + transparent jar + helper; a hand vacuum pump (bicycle track pump with a one‑way valve) can be improvised carefully for vacuum bleeding.
- Radiator cleaning: use water and a mild degreasing agent. Do not use diesel or petrol for cleaning radiators — unsafe and damaging.
- Sealing small coolant leaks: epoxy putty designed for cooling systems or aluminium radiator soldering at a later time. Avoid proprietary sealants that can clog system passages unless necessary for emergency use.
- Replacements: local scrapyards and vehicle breakers can be sources of low‑cost pumps, caps, thermostats and brake parts—inspect used parts carefully for wear and corrosion.
Environmental and safety considerations
- Collect used oil in sealed containers and deliver to a local recycling point or approved waste handler where possible. Avoid dumping on ground or into drains.
- Used coolant is toxic; avoid ingestion by animals and children. Store and dispose according to local guidance; reuse is not recommended.
- Brake fluid is corrosive to paint—wipe spills immediately with plenty of water and mild detergent.
- When soldering or welding radiators, ensure fumes are controlled and use eye protection.
- Always record fluid changes and repairs in the vehicle logbook.
Preventive maintenance schedule (basic, resource‑efficient)
- Every 1,000–2,000 km or weekly: check oil level, coolant level, brake fluid level and inspect for leaks.
- Every 5,000–10,000 km: change engine oil and filter (vehicle dependent). Inspect belts, hoses, brake linings.
- Every 20,000–40,000 km: flush cooling system, replace coolant if used regularly; replace brake fluid every 1–2 years (sooner in humid climates).
- At first sign of symptoms: inspect and act immediately — small problems are cheaper to fix early.
Competency assessment exercises
Practical tasks (to be done under supervision):
- Demonstrate a full oil and filter change, document drained quantity and final dipstick reading.
- Perform a radiator cold flush and refill with recommended fluid or water with inhibitor; show that the system is bled of air and demonstrate temperature stability on a short test drive.
- Inspect and replace worn brake pads or shoes on one wheel; perform a brake bleed and demonstrate proper pedal firmness and no fluid leaks.
- Diagnose a simulated spongy pedal and complete a documented bleed and leak inspection.
Short written/quiz items:
- Explain why brake fluid must be kept free of air and why DOT types should not be mixed carelessly.
- Describe the symptoms of a failed water pump and the checks you would perform.
- List three environmental precautions when handling used engine oil and coolant.
Final notes and best practices
- Safety first: always secure the vehicle and use PPE.
- Record keeping: keep a simple log of fluid types, quantities, dates and observed symptoms — invaluable for troubleshooting in resource‑constrained settings.
- Local sourcing & networking: build a network with local parts suppliers and scrap yards; many inexpensive, reliable items (caps, thermostats, hoses) can be found used and checked before installation.
- Temporary repairs: accept that some fixes are temporary. Clearly mark temporary fixes in records and arrange definitive repairs as soon as feasible.
This topic provides foundational, practical skills for maintaining lubrication, cooling and braking systems using low‑cost methods and locally obtainable resources. Students should practice under supervision until procedures and safety checks are mastered.